How to Import Zoom Recordings and Generate Summaries with Embeddings
Introduction
In this tutorial, we will demonstrate how to import Zoom meeting recordings, transcribe the audio, summarize the content, combine the transcription and summary, generate embeddings for the combined text, and export them to Pinecone for further analysis or machine learning purposes using Mantium.
Video
We understand that sometimes it's easier to learn by watching rather than reading. If you prefer a more visual explanation, feel free to check out our accompanying video tutorial below. If you prefer reading or are unable to watch the video, please continue with the text documentation.
Objective
Our goal is to show you how to import Zoom meeting recordings, transcribe the audio to text, summarize the content, combine the transcription and summary, generate embeddings for the combined text, and export them to Pinecone for further analysis or machine learning purposes.
Prerequisites
- Take a few moments to set up the API key for OpenAI.
- To use the Zoom connector, you need a paid Zoom account.
Connect to Zoom & Create Datasets in Mantium
Connect to Zoom
To do this:
- Navigate to the Data Sources section by clicking
Data Sourceon the left navigation bar. - Select the Zoom from the Data Sources list.
- You can either choose an existing connector if you have the Zoom connector setup or you can Add a new Zoom Connector.
- If you are adding a new connector, grant Mantium access on the OAuth page by signing into your Zoom account.
- Provide the information to label the Data Source, and also set “Sync Frequency” to keep your data refreshed.
- Wait a few moments for the sync to be completed, and you will have your data ready for further transformation.
Creating Datasets
Datasets serve as the central workspace where you can apply transformations and enrichments to data retrieved from various sources, enabling you to modify and analyze the data without impacting the original information.
To create a new dataset:
- After the sync is completed, Click on the
**Create Custom Datasets**button in the Data Source section. - Alternatively, you can create datasets by navigating to the Datasets section on the left pane.
- Provide a Dataset name, and select where the data comes from (Zoom Data Connector).
- Click on Save to save your configuration, and wait for the job to complete.
Apply Transformation
After creating datasets from the Zoom Data Source, it’s time to apply transformations that will restructure the texts.
Below are the transformations that we can apply on the Zoom Data Source.
Transcribe Audio
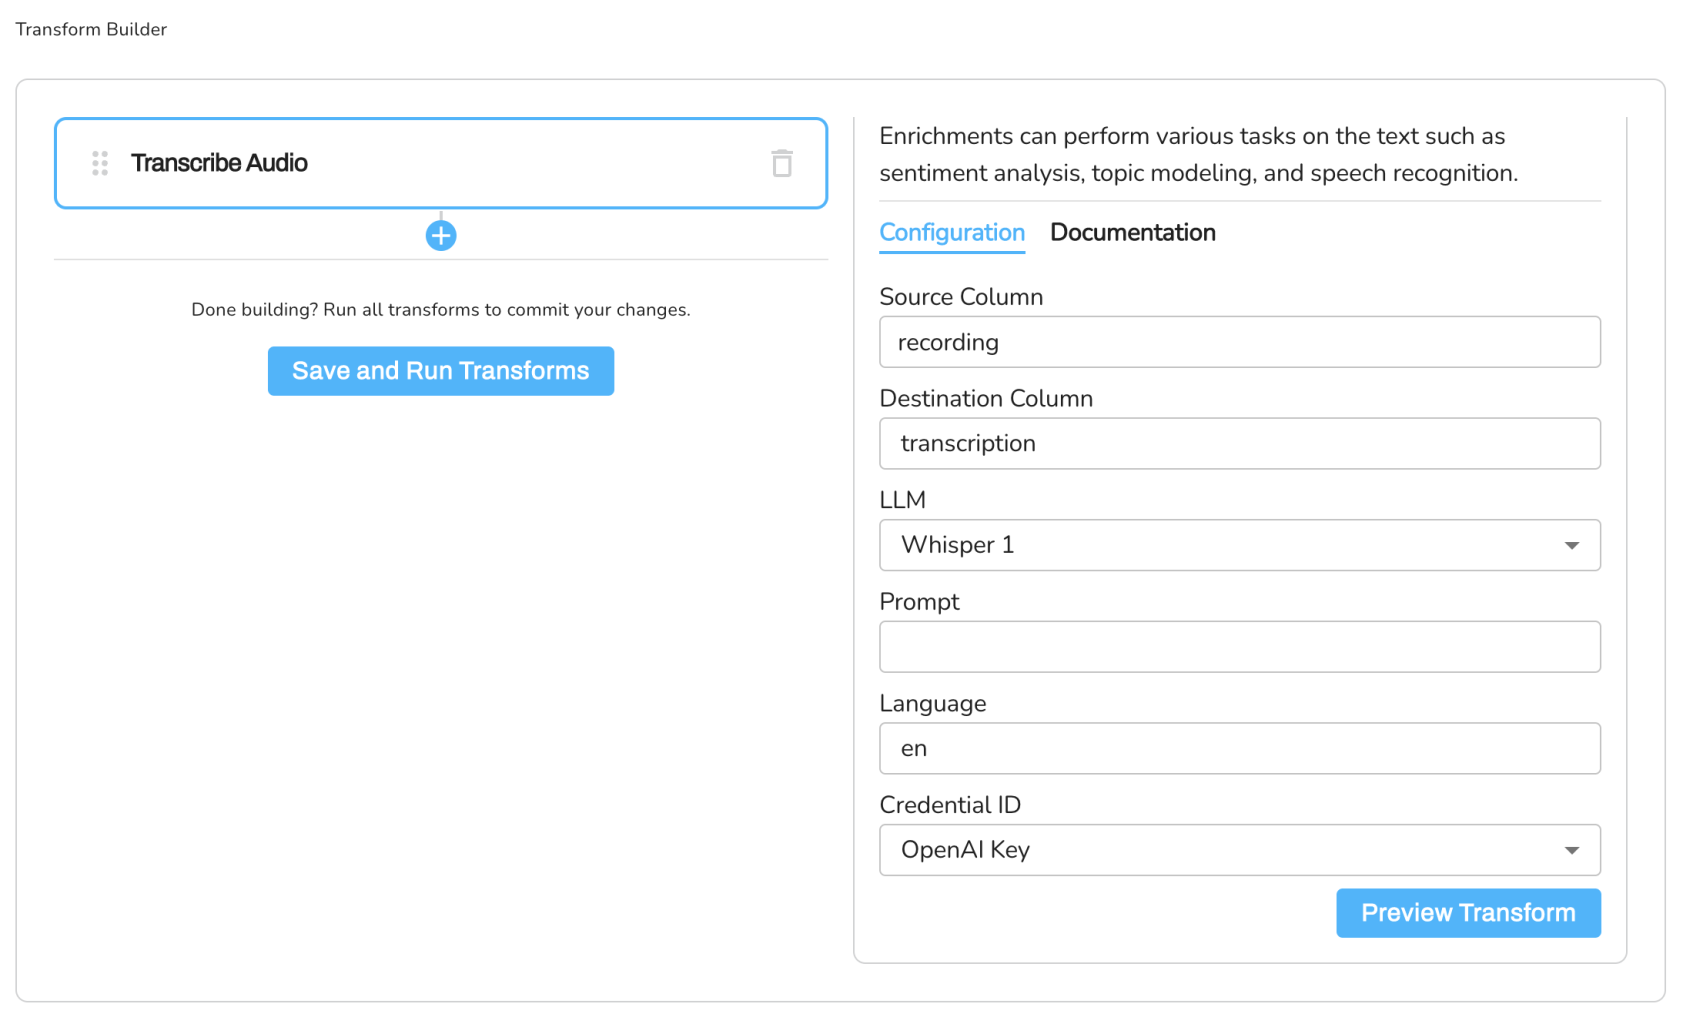
Mantium's Transcribe Audio transformation allows you to convert recorded meetings, speeches, or interviews into text. Here, we are going to apply it to the Zoom meeting recordings to convert the audio files to text.
- Navigate to Transforms in the Datasets section, and select Transcribe Audio from the list of transforms.
- Configure the Source Column parameter by selecting the column containing the audio files you want to transcribe.
- Configure the Destination Column parameter by specifying the new name for the column that will hold the transcriptions.
- Configure the Transcription Model parameter by selecting the LLM model to use for the transcription.
- Optionally input the Prompt Text to guide the LLM model’s style. Ensure that the text language should match the audio language.
- Select the language you want the audio to be transcribed to.
- Configure the Credential ID parameter by selecting the appropriate credential from the list of available credentials in your Mantium account.
- Run the transformation by clicking the Save and Run Transforms button. The resulting dataset will have a new column with the specified Destination Column name which will contain the transcribed text for each audio file in the source column.
Summarize Text
We are chaining this transformation to the initial one (Transcribe Audio), and run it sequentially.
To do this;
- Click on the Plus sign (+) at the bottom of the transform.
- Select the
Summarize Texttransform from the list of transforms - Enter the configuration parameter as shown below (also see image below).
Source Column: transcription
Destination Column: summary
LLM Model: Gpt-3.5-turbo
Prompt Template: "Summarize this document: $field_source_column Summary:"
Credential ID: OpenAI
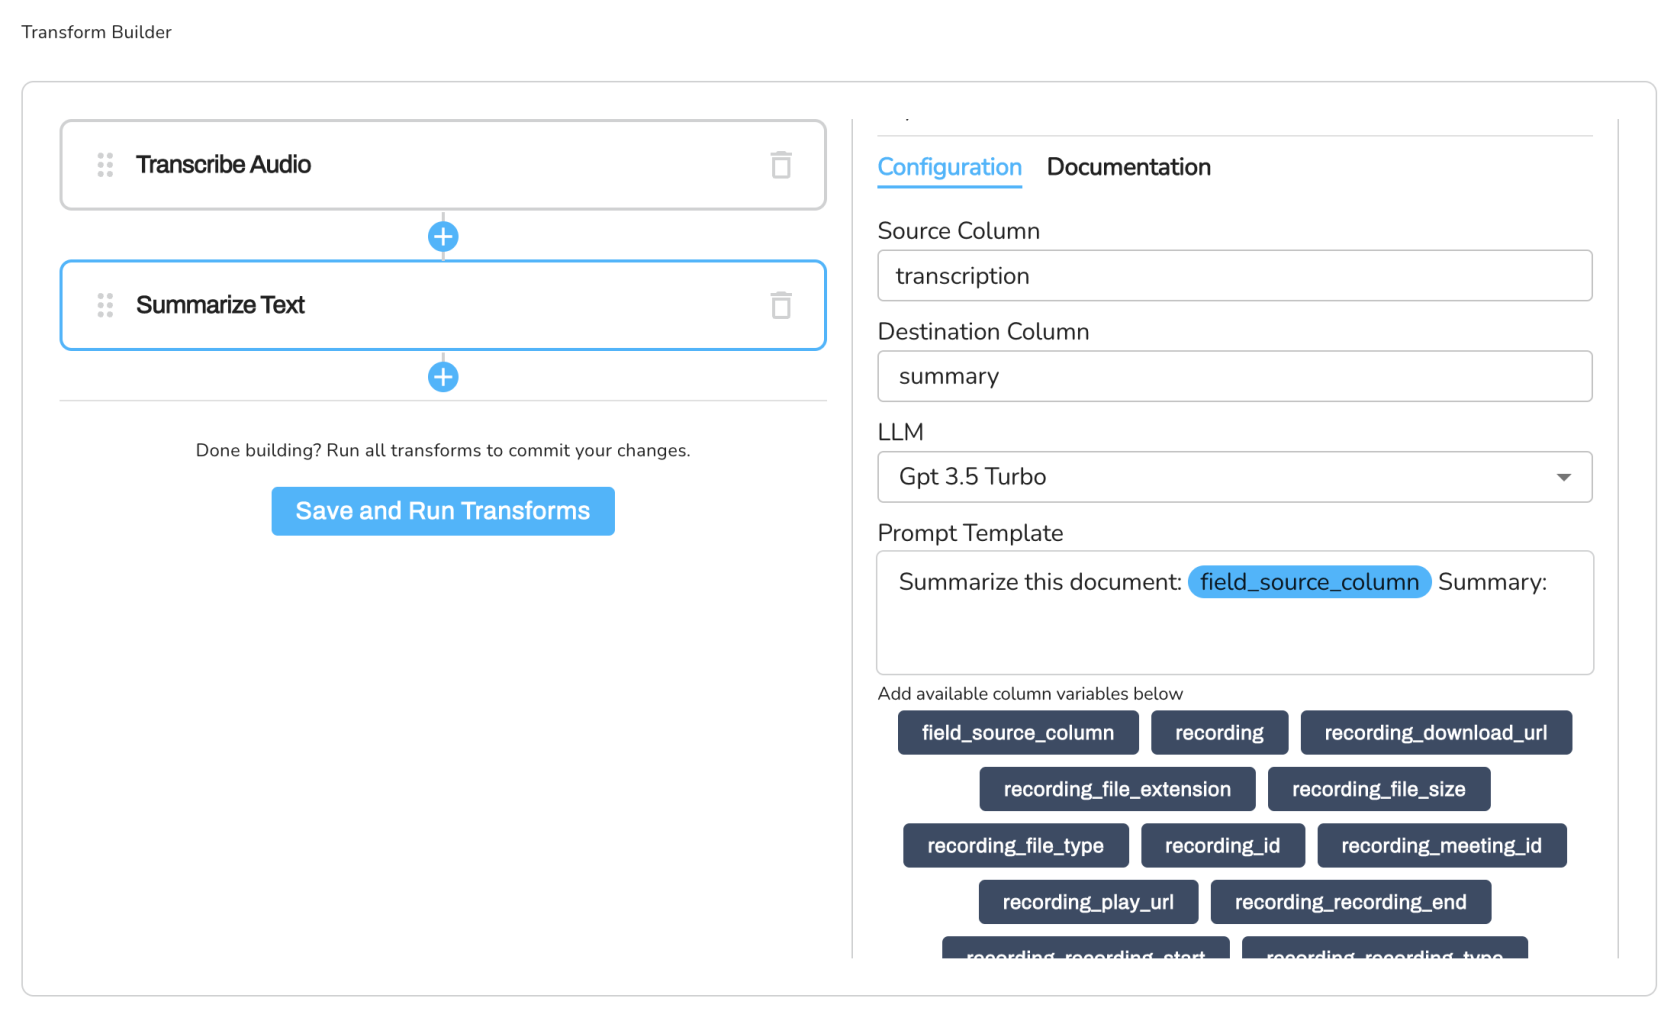
Notice that the Source Column here is the transformed column transcription from the previous transformation step (Transcribe Audio). Also, ensure that you have connected your OpenAI credentials to the platform, see steps here.
- Click on the Plus sign(+) to add the next transform.
Combine Columns
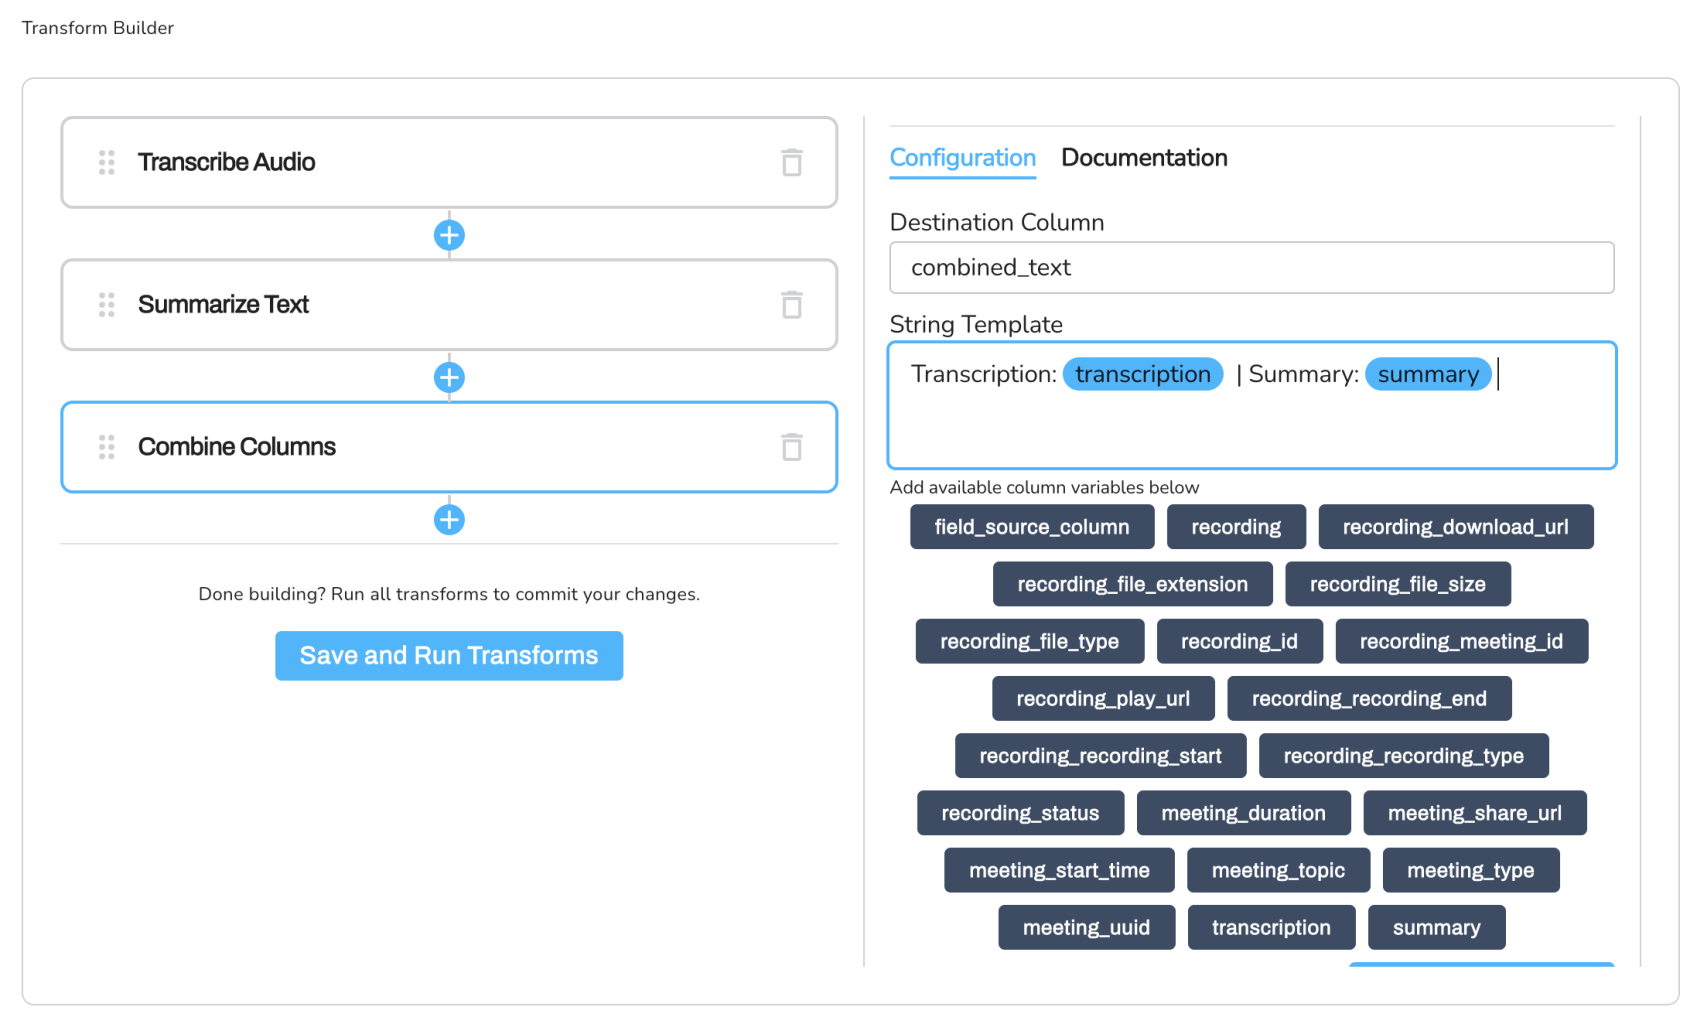
Here, we are going to combine the transcription column and the summary column together.
- Select the
Combine Columnsfrom the list of transforms - In the
Destination Columnfield, entercombined_textto create a new column that will hold the combined data. - In the String Template field, enter
Transcription: $transcription | Summary: $summaryto define the pattern for combining the transcription and summary columns. - Click on the Plus sign(+) to add the next transform.
Generate Embeddings
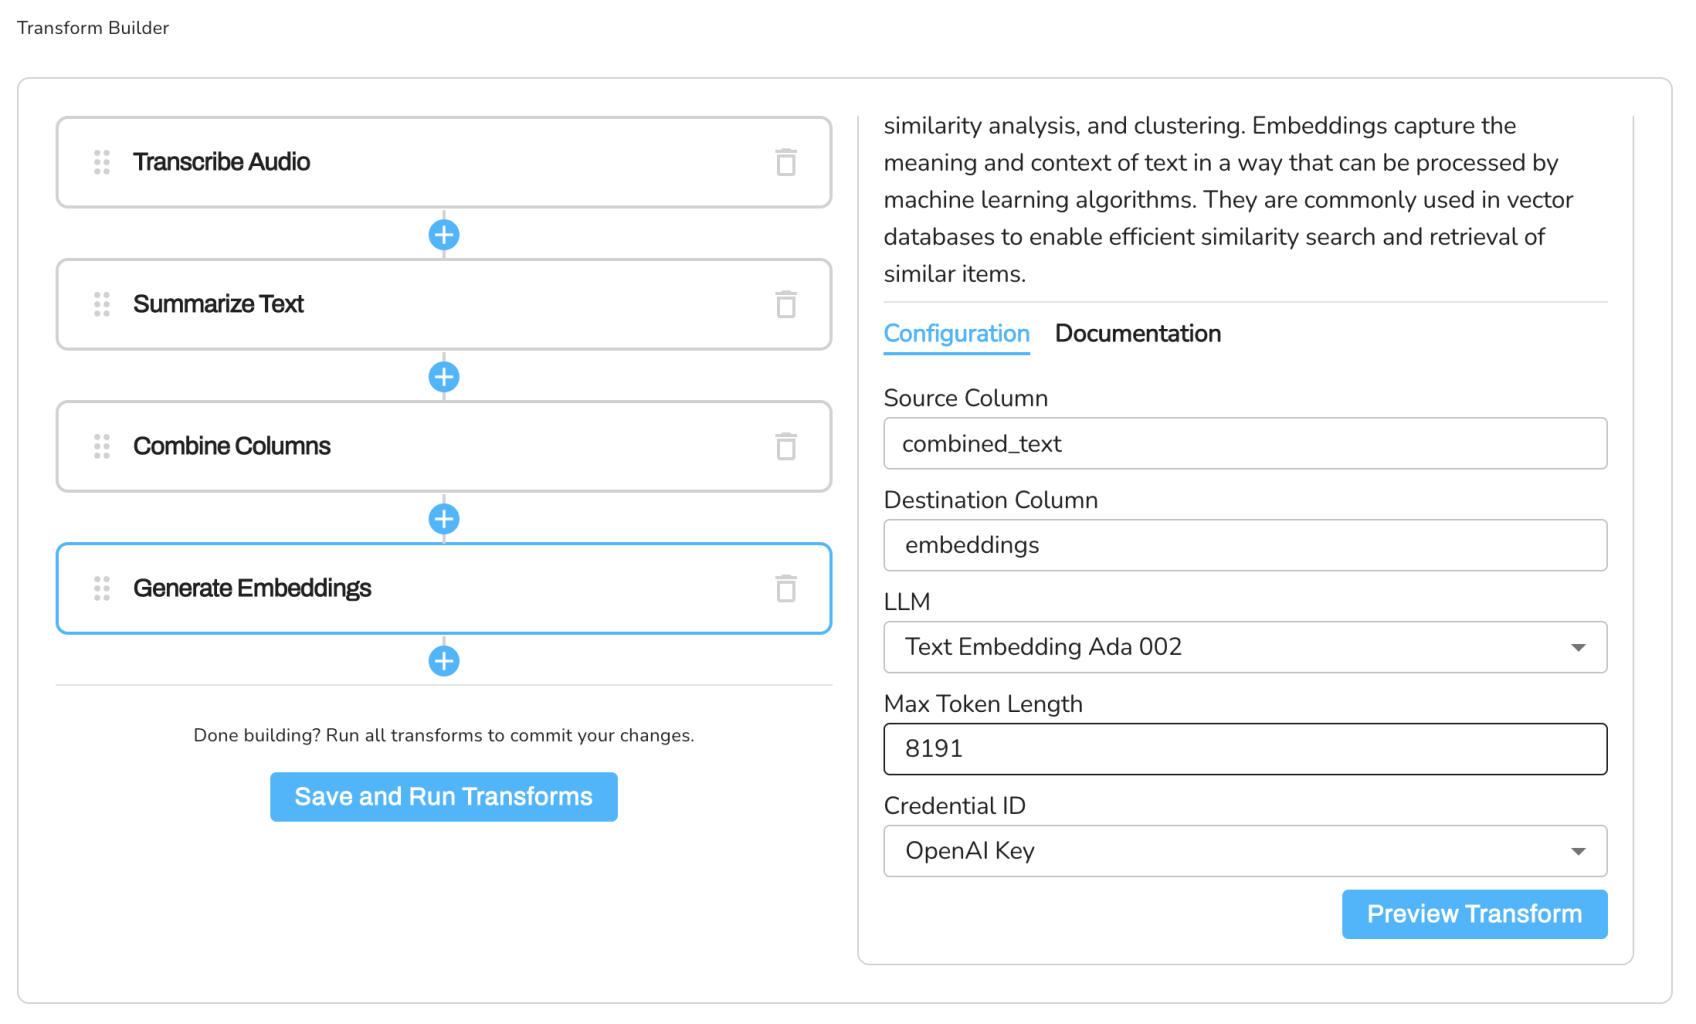
Finally, we are going to generate numerical representations(embeddings) of the combined_text column. This embeddings is what we are going to ship to Pinecone (the Vector Database).
- Select the
Generate Embeddingsfrom the list of transforms. - Configure the Source Column parameter by selecting the column containing the
combined_text. - Configure the Destination Column parameter by specifying the new name for the column that will hold the embeddings.
- Configure the Embedding model parameter by selecting the LLM model to use for the embeddings.
- Enter the Max Token Length, you can leave the default value -
8191 - Configure the Credential ID parameter by selecting the appropriate credential from the list of available credentials in your Mantium account.
Configuration details
Ship Embeddings to Pinecone
Now that we have the embeddings of the text data. The next thing is to export it to Pinecone for efficient storage and querying.
- The first thing to do is to set up your Pinecone account, and connect it with your Mantium account.
- Navigate to Destination in the Dataset section to add a destination. (see image below)
- Provide your Pinecone details in the form, and click the
Save buttonto ship the embeddings to Pinecone.

- In your Pinecone account, check your Index to confirm that the embeddings is now in Pinecone.
Conclusion
In this tutorial, we have demonstrated how to leverage Mantium's capabilities to transcribe, summarize, and generate embeddings from Zoom meeting recordings. We have shown how to connect Mantium to your Zoom account, import Zoom meeting recordings, apply various transformations to the data, and export the results to Pinecone for further analysis or machine learning applications.
By following these steps, you can automate the process of transcribing and summarizing your Zoom meetings, and generate valuable insights from the meeting content. The generated embeddings can be used for various purposes, such as semantic search, meeting insights, automatic tagging and categorization, and meeting summarization and knowledge extraction.
Updated about 3 years ago