How to Chat with Technical Documentation using Mantium's Readme.io connector and Plugin Wizard
Introduction
Readme.io is a widely used platform that companies and projects utilize for hosting their technical documentation. It provides a user-friendly interface for creating and managing API documentation, guides, tutorials, and other technical materials in a single location.
In this tutorial, our aim is to guide you through the process of importing data from a Readme.io documentation site. Specifically, we will be importing all the tutorials and guides from this very site into Mantium. Afterwards, we'll interact with this imported data using ChatGPT.
Import Documentation from Readme & Create Datasets in Mantium
Using our Readme.io connector, we will set up a job that imports all the tutorials and guides from the Mantium docs (Readme.io hosted), and then create datasets from the data source connector.
Here's how to set it up:
- If you haven't setup the Readme.io connector follow this tutorial to do so.
- After the job is done, click on Create Custom Dataset.
- Provide a name for the dataset and click on Save.
Alternatively, you can create datasets from the Datasets section on the left navigation bar. Ensure that you have the Readme.io connector setup, and you've imported the data into Mantium following the steps highlighted here.
Once the dataset is created, navigate to the Transform section to add transformations to the dataset.
Add Transformations
Split Text Transformation
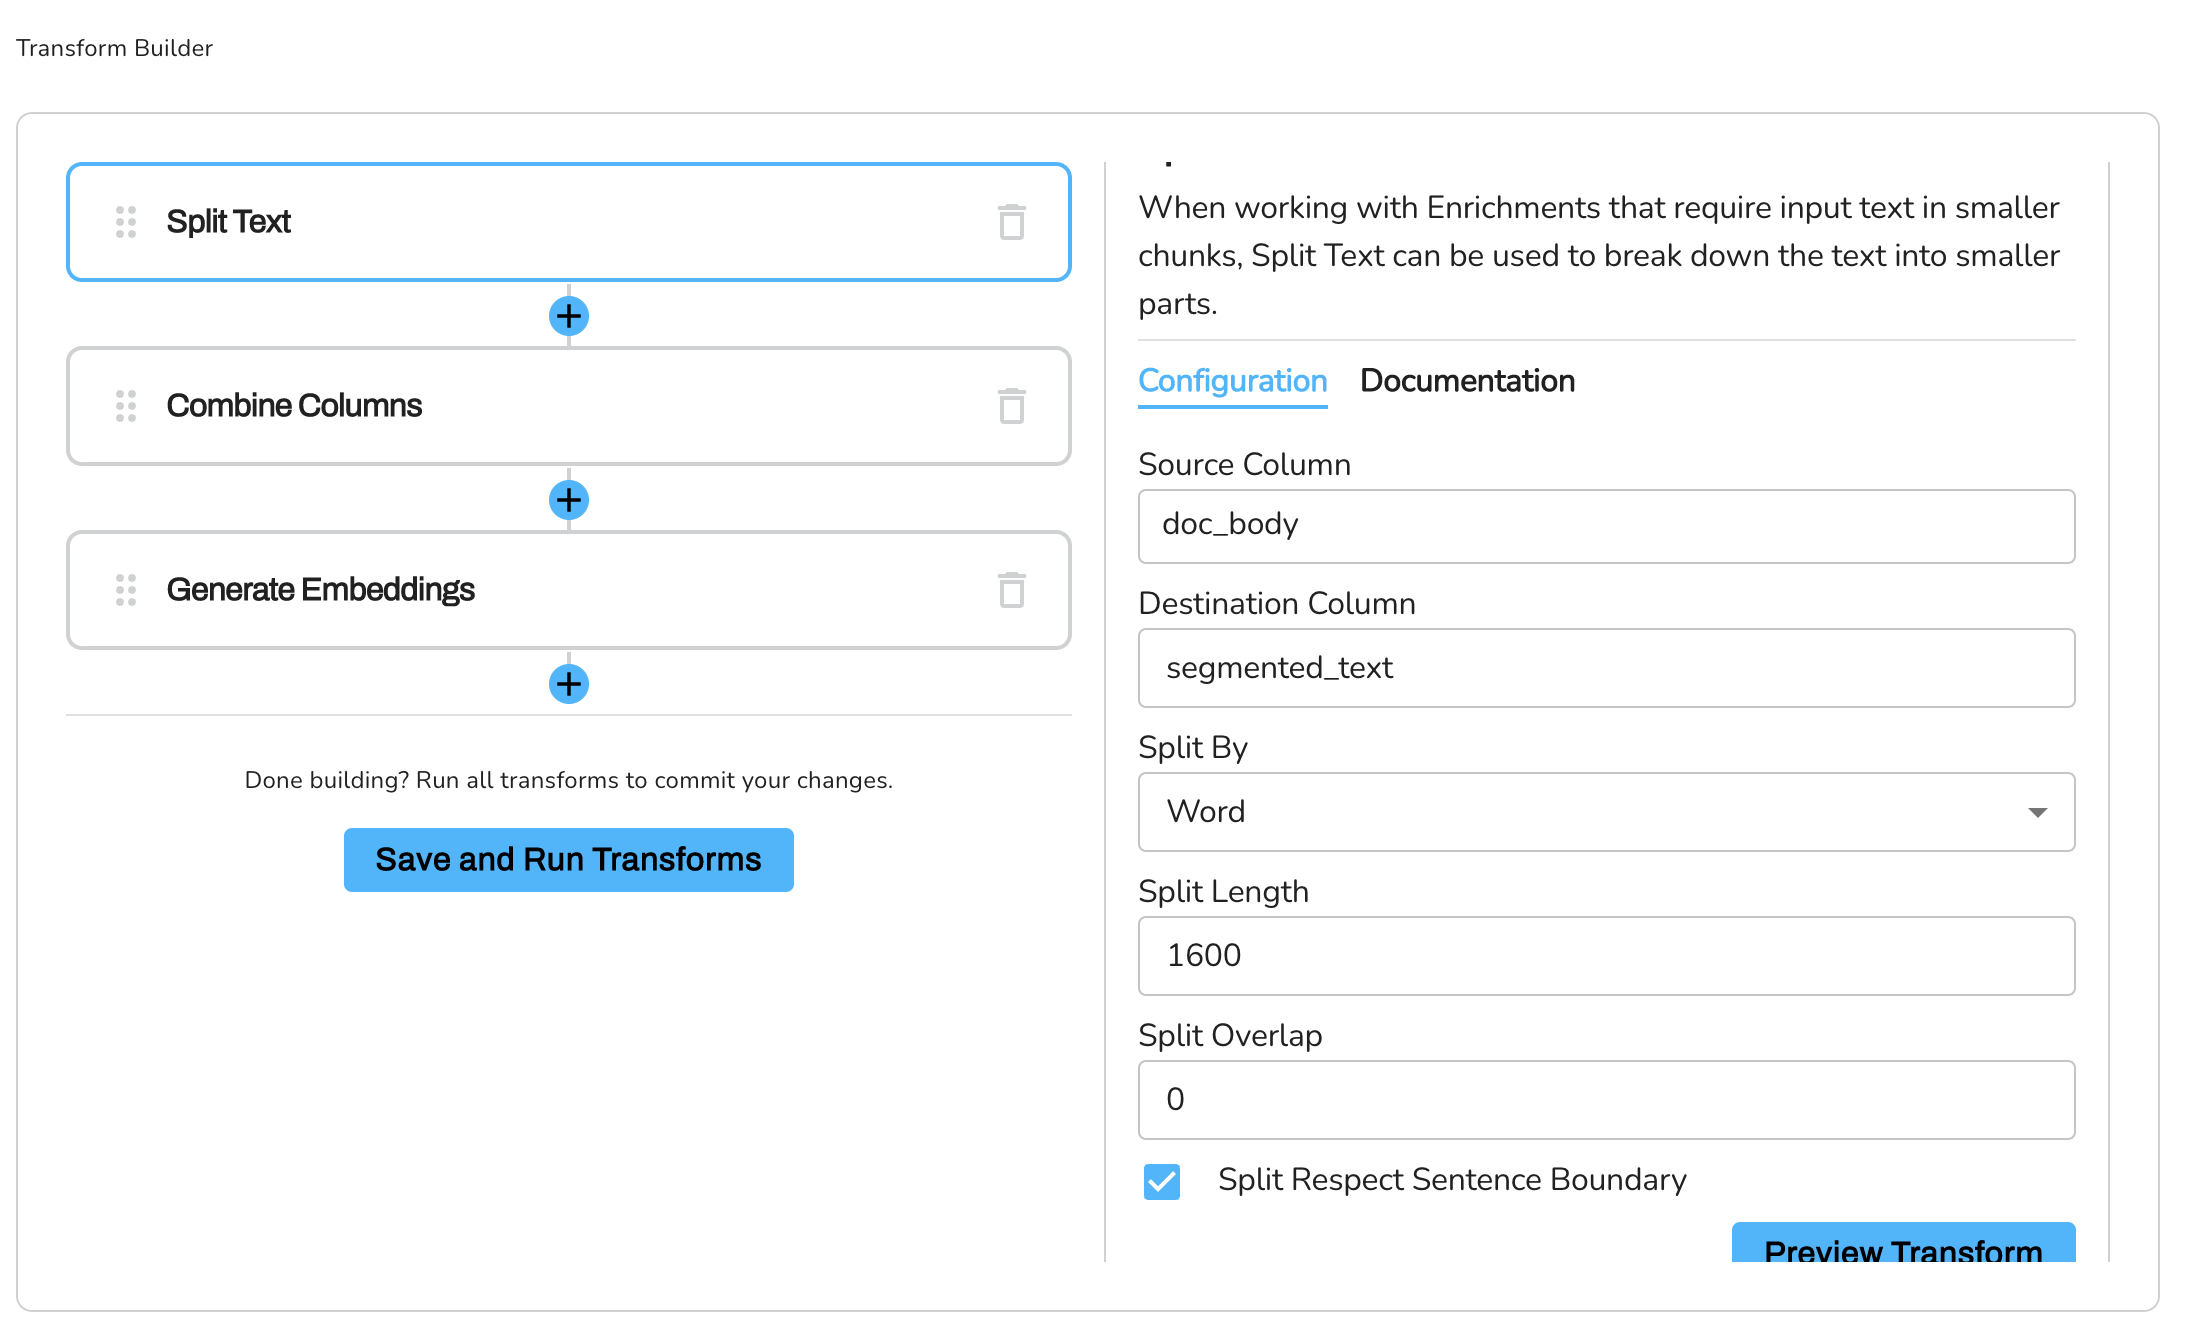
For this tutorial, we're going to be working with the "Split Text" transformation.
The "Split Text" transformation is used to split the content to get it ready to generate embeddings on that so that it doesn't go above the OpenAI recommendation.
Here's how to set it up:
- Click on Transform and select Split Text from the dropdown menu.
- In the Source Column field, add the doc_body column. This is the column that contains the content - tutorials, documentation, and guides.
- In the Destination Column field, type "segmented_text". This will be the new column that will hold the segmented text.
- Set "Split By" to "word". This means the text will be split at every word.
- In the "Split Length" field, type
1600. This means the text will be split every 1600 words, creating an additional row. - Leave the remaining configuration as default.
- Click on the Plus sign(+) to add the next transform. The job will run and split the text in the "content" column into smaller chunks of 1600 words each, storing the result in a new column called "segmented_text".
This transformation is crucial as it prepares your data for the next steps, which include combining columns and generating embeddings for the ChatGPT interface.
Combine Columns Transformation
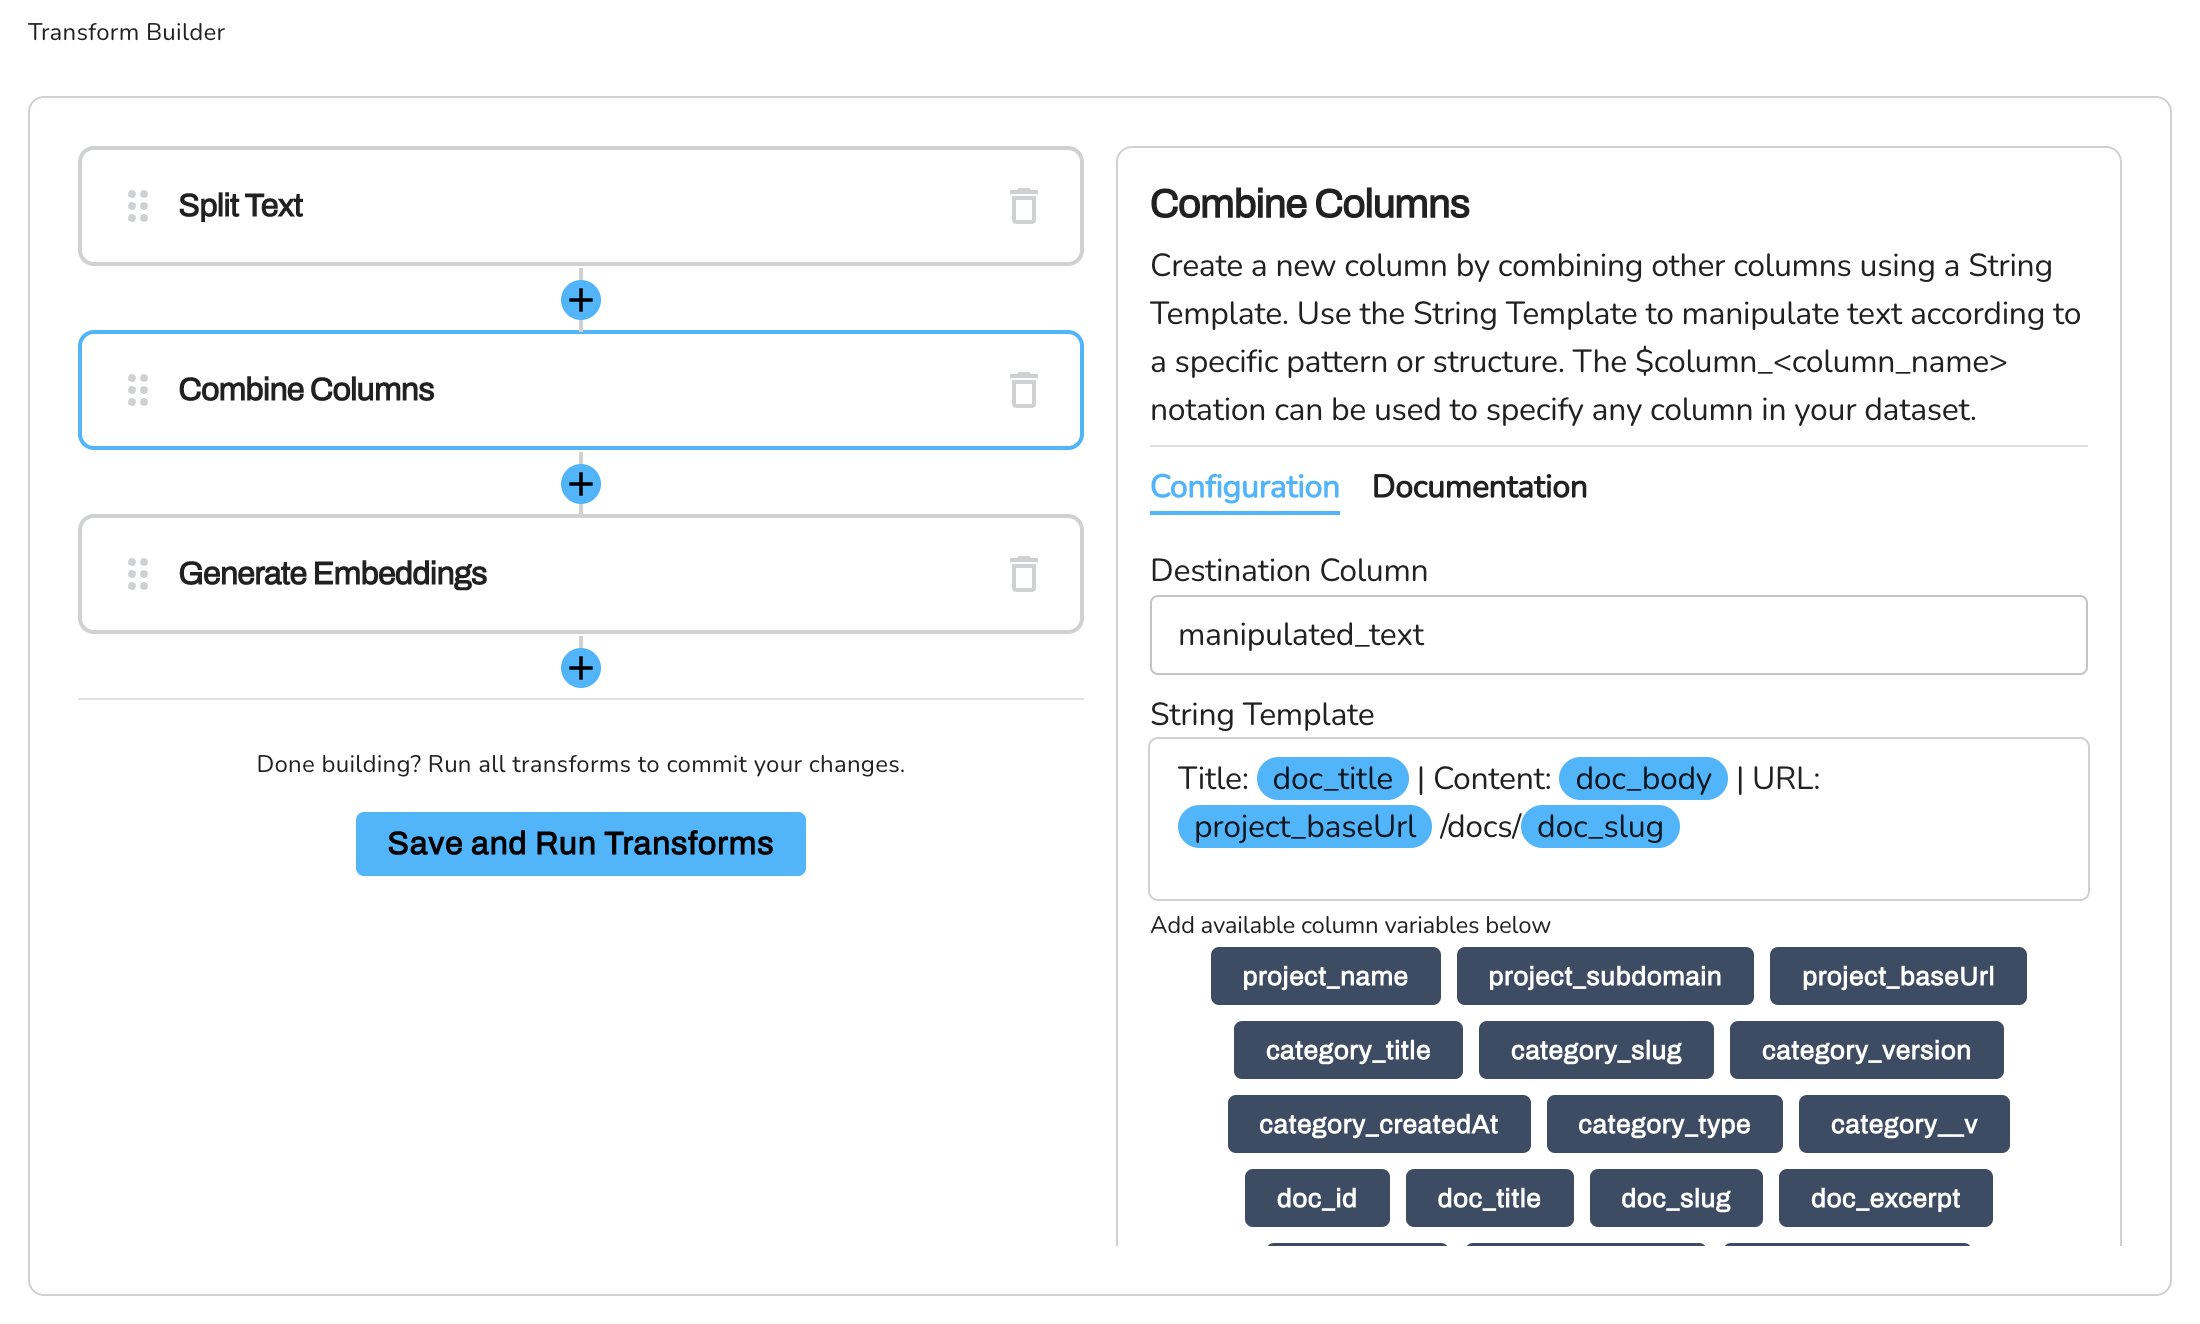
Next, we'll use the Combine Columns transformation to merge the title, segmented content, and source URL into a single column. This combined column will be used to generate embeddings in the ChatGPT use case.
- Select the Combine Columns from the dropdown menu.
- In the Destination Column name field, type
**combined_text**. This will be the new column that will hold the combined data. - In the String Template field, enter
Title: doc_title | Content: doc_body | URL: project_baseUrl /docs/doc_slugto define the pattern for combining columns. Add the columns by selecting the column variables. Be mindful of the structure used to generate the URL for each document; it merges the base URL with the doc_slug to create a comprehensive URL. Hence, the final format for the URL would look like this: -URL: project_baseUrl /docs/doc_slug - Click on the Plus sign(+) to add the next transform.
Generate Embeddings
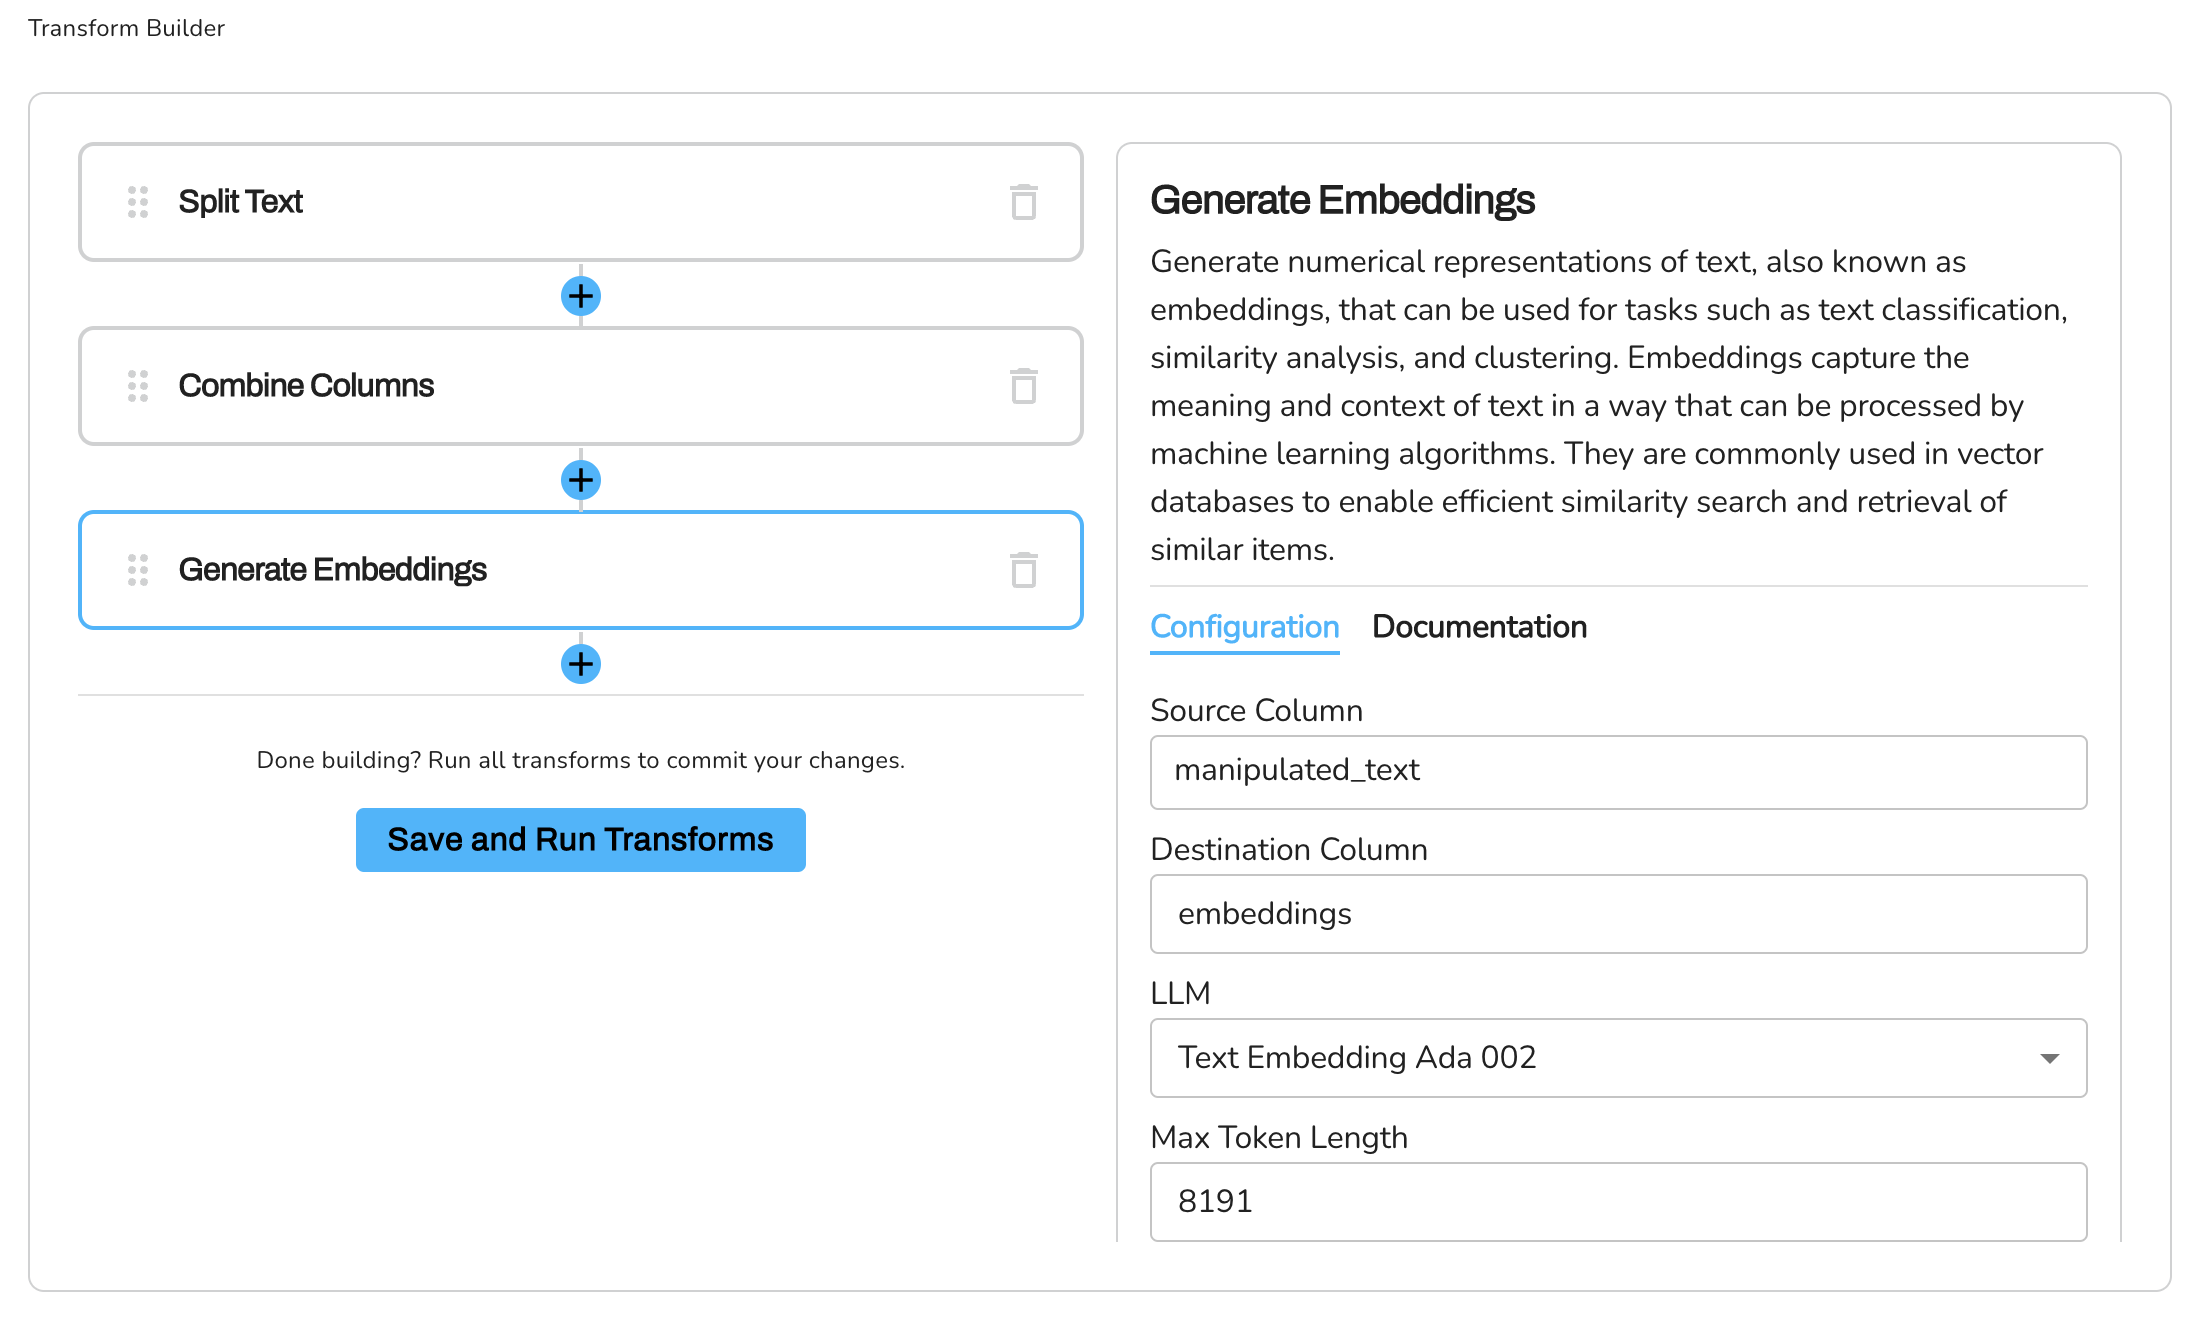
We are going to generate numerical representations(embeddings) of the manipulated_text column. This embeddings is what we are going to ship to Redis (the Vector Database) for ChatGPT to query for response.
- Select the Generate Embeddings from the list of transforms.
- Configure the Source Column parameter by selecting the column containing the
combined_text. - Configure the Destination Column parameter by specifying the new name for the column that will hold the embeddings.
- Configure the Embedding model parameter by selecting the LLM model to use for the embeddings.
- Enter the Max Token Length, you can leave the default value -
8191 - Configure the Credential ID parameter by selecting the appropriate credential from the list of available credentials in your Mantium account.
Create your App in Mantium
Quick Warning
- If you select the Standard option and have previously created a split_content column, ensure to pick this same split_content column in subsequent steps rather than the original text column. This will prevent the unnecessary expansion of your dataset, ultimately keeping your OpenAI usage costs in check.
- Ensure to select the Advanced option if you have Embeddings already.
Instructions
Please follow the link below to find instructions on how to create your Mantium apps. Note that we have the embeddings column already, so we will use the Advanced option when creating the app below.
Interact with your App in ChatGPT.
There are two ways to interact with your app in ChatGPT;
- Use Mantium's ChatGPT Plugin to Interact with your App.(Recommended)
- Setup your own OpenAI ChatGPT Plugin, if you have developer access - which means you have the ability to create plugins in ChatGPT.
Use Mantium's ChatGPT Plugin
Please follow the link below to find instructions on how to setup the Mantium official plugin.
Setup your Own OpenAI Plugin
Please follow the link below to find instructions on how to setup your own plugin.
Chat with your Documentation
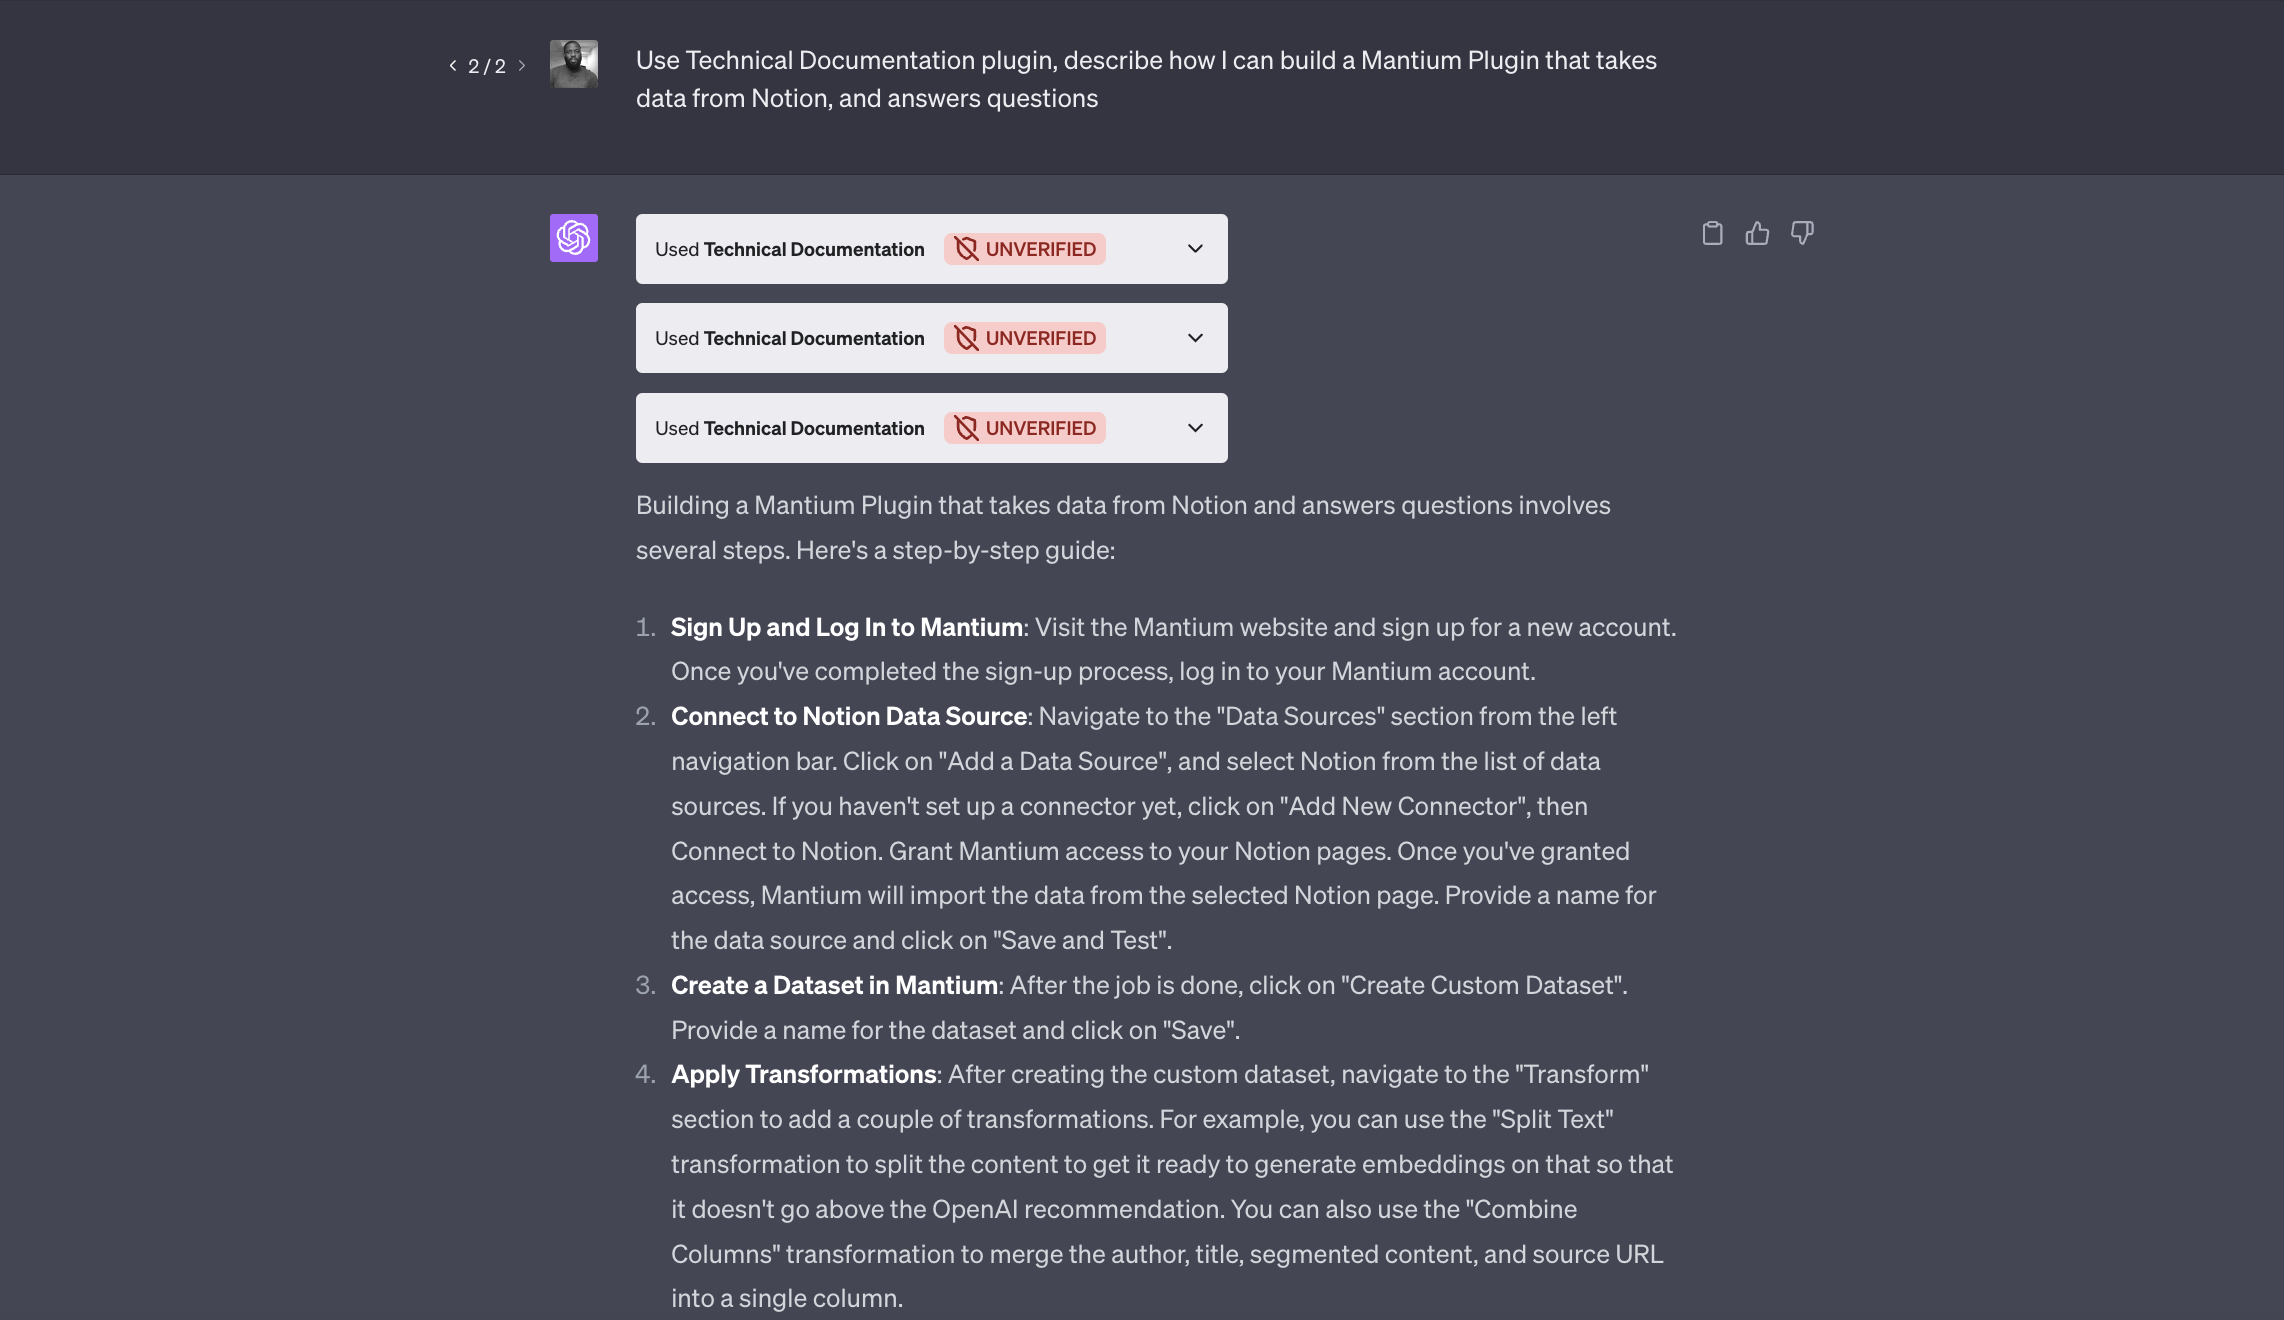
Now, let's interact with the app/plugin in ChatGPT. Here is an some example prompt:
Prompt
Use Technical Documentation plugin, describe how I can build a Mantium Plugin that takes data from Notion, and answers questions
Updated about 3 years ago